Foam rollers have become increasingly popular pieces of home exercise equipment globally. There are several different types of foam rollers available, each with different densities and surfaces, but the overall purpose is the same: they provide a quick and easy way to relieve muscle soreness, tightness, or pain. Using one of these versatile rollers, you can literally give yourself the equivalent of a deep tissue massage in a matter of minutes, making them a must-have tool in any good home gym.
The problem is, most people don’t know how to properly use one! There are a lot of different foam roller exercises and stretches to try, but without proper technique and form, you’re going to be scratching your head wondering why nothing is working to relieve your soreness.
We’ve created a comprehensive list of foam roller exercises, and in this guide we’re going to teach you proper technique and show you images and videos so that you can easily learn the movements and begin doing this on your own like a pro. No matter where you’re feeling muscle soreness, there’s a foam roller solution for you here. Here’s a quick table of contents in case you know right where you want to go:
Back, Neck, & Spine
People are often searching for foam roller exercises to help relieve back pain. In this category, I’m going to teach you some of the most recommended exercises, as well as a few you should actually avoid.
Lower Back
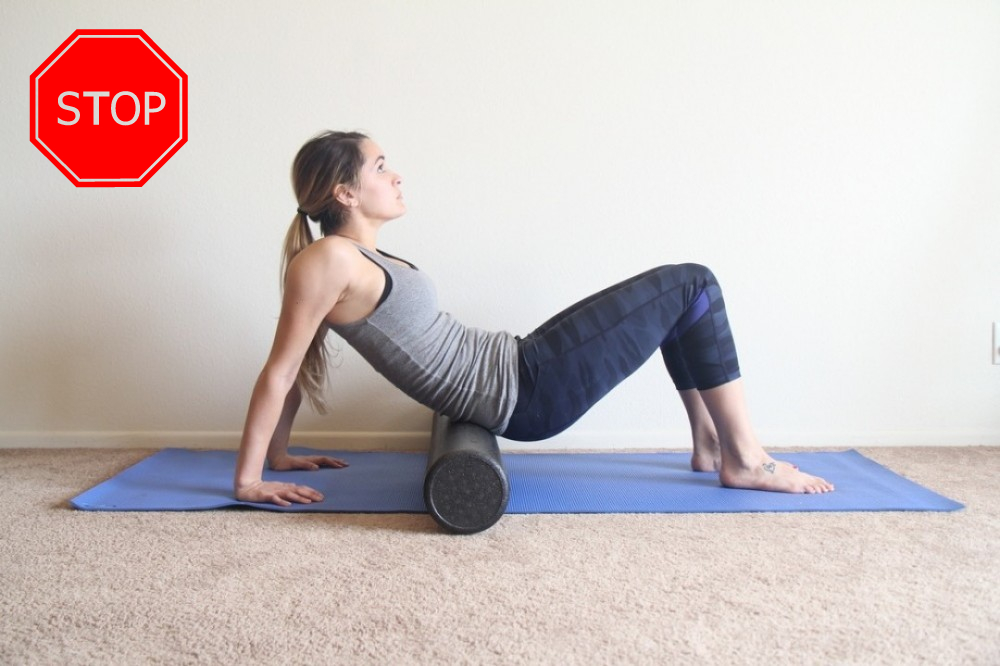
There’s a lot of controversy surrounding doing foam roller exercises on your lower back. Some people recommend it, while others advise against it. I am one of the people that says don’t do it. But why? I realize that goes against a lot of stuff you’ve read online about how foam rollers help ease lower back pain, but hear me out for the next 60 seconds and you’ll see why I’m against it. Back in 2014, I read a report released by the National Academy of Sports Medicine, a respected institution, advising against the use of a foam roller on your lower back. It’s a pretty long article, but I’ve essentially summarized it for you below:
The reason most people want to use a foam roller on the lower back is to alleviate lower back pain (that’s understandable to most of us, right?). The problem is, lower back pain is rarely ever caused by the lower back muscles themselves. It’s actually mostly caused by other muscles like your hip flexors, glutes, and even the calves (just to name a few). When you foam roll your lower back, you’re putting a ton of pressure on vital organs like your kidneys and your liver, which can be seriously bad for your health if you continuously do this over time. Thankfully, there is an easy solution. The professionals at NASM recommend using smaller more lower-back-specific tools like a massage pillow or massage balls as those tools offer far more benefits for lower back relief than a foam roller could provide. My personal favorite is the Shiatsu Neck & Back Massager Pillow. I bought it shortly after reading that article and have used it almost every day since. Best $30 I’ve ever spent!
So as you can see, there are legitimate reasons why some experts do not recommend foam rolling the lower back. You are still welcome to try it if you’d like, but take it from someone like me who has had a lot of lower back issues, the smaller massage tools are far better than the foam roller.
Upper Back
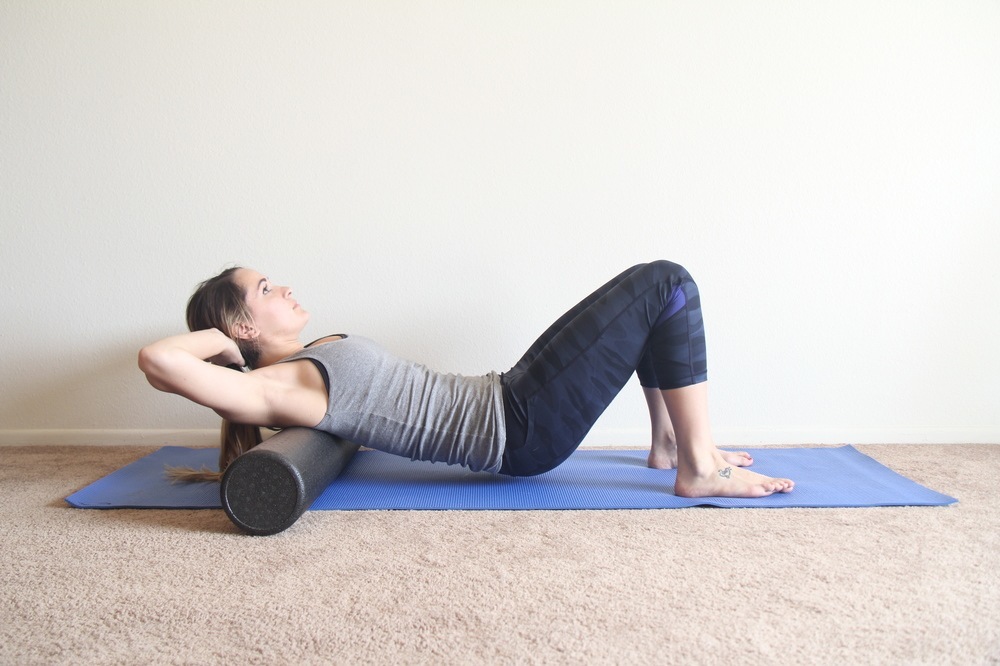
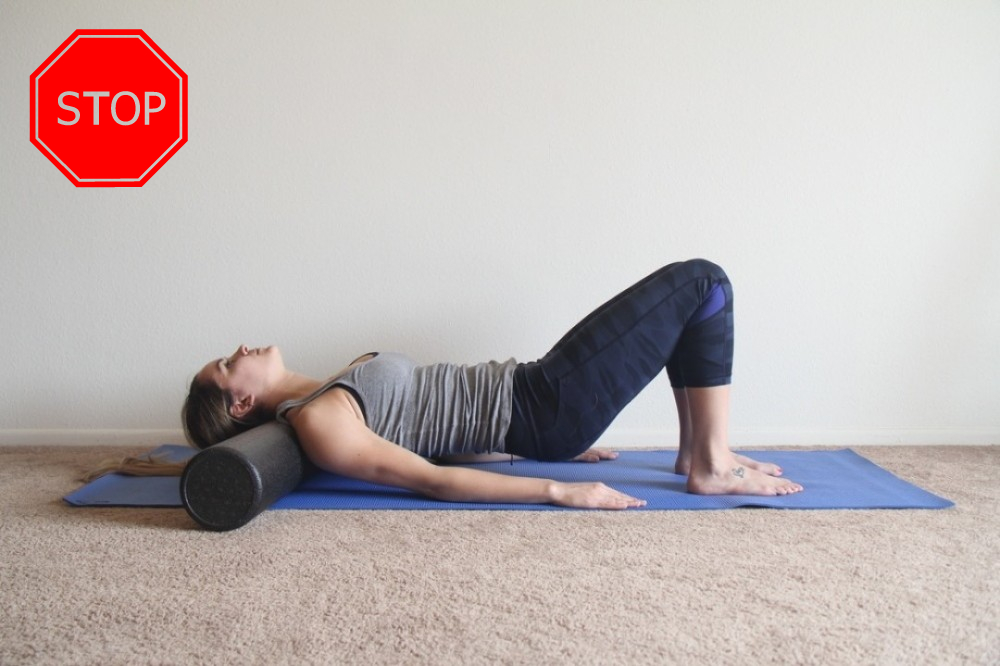
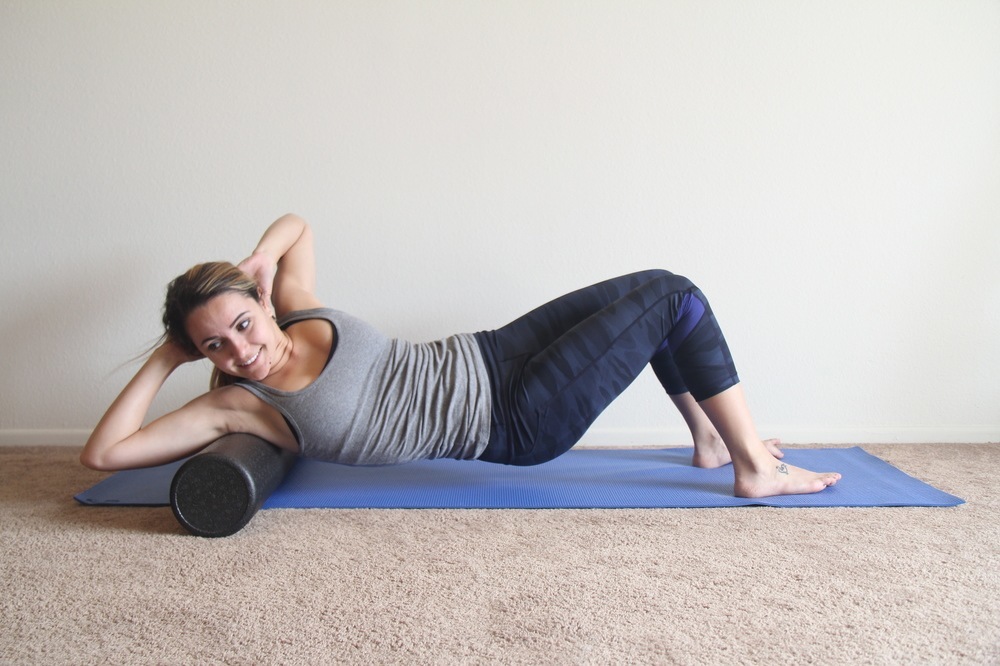
Sit on the floor and place your foam roller about a foot behind you. Keeping your legs bent and your feet planted firmly on the floor in front of you, slowly lie down backward until you are lying with the roller resting beneath your upper back (around where the shoulder blades are). Once you’ve found a comfortable position, raise your hips up off the ground. Your body weight should be primarily shifted on top of the roller so you get the best massage on the back muscles. Using your feet as leverage, move your body up and down the foam roller from the mid-back to the shoulder area just below the neck.
Pro tip: there are actually a couple of different foam roller stretches you can do while your body is in this position in order to target certain back muscles. First, you can target specific muscles just by placing your arms in different positions. With your arms placed at your sides, the roller is targeting general upper back muscles. If you put your arms up and behind your head, this opens your rib cage and helps target the lat muscles better (Self). Finally, if you hold your arms in front of your chest and tuck them inwards, this will help put more focus on the innermost upper back muscles, the rhomboid, and the traps. In addition to these arm variations, you can also opt to roll your body sideways from left to right rather than up and down. This also targets the rhomboids and will really ensure you hit every little muscle across your back (PMC).
Thoracic Spine Extension
The thoracic spine extension can be a bit tricky, but when mastered, can be very beneficial to your back. You actually start this foam roller stretch just like the upper back exercise above. Sit on the floor, keep your legs bent and feet planted on the floor in front of you, and place the foam roller right behind you. With this stretch, you won’t be doing any rolling. Instead, keep your butt on the floor and lean back onto the foam roller so that your torso sits at a 45-degree angle. Bring your arms up in front of your face, tuck your elbows together, and place your hands on top of your head. Now, take a deep breath, and as you exhale, slowly bend your body backwards over the foam roller. Remember, keep your glutes on the floor, you’re looking for purely back extension here. The more your back arches, the better. After you’ve completely exhaled and gotten the full stretch, lean your body back up to a 45-degree angle and repeat the steps. Deep breath and stretch.
Pro tip: Once you’ve mastered the general stretch, try leaning your body at different angles. Instead of a 45-degree angle, try a 30-degree angle or a 60-degree angle. Varying the angle at which you stretch can help keep a healthy range of motion in your spine.

Thoracic Spine Matrix
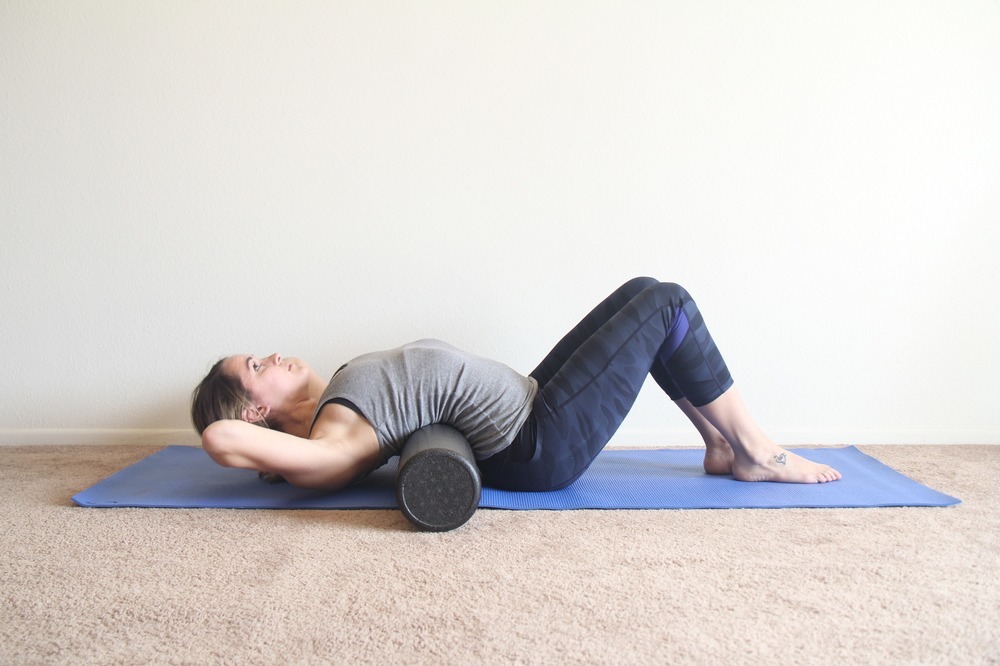
The thoracic spine matrix is another great foam roller exercise to target the back, and it also does a great deal for the chest. This one is a bit different, though. Place the foam roller on the floor and you’re actually going to sit on one end of the roller, so that the rest of the roller is pointing backward and away from you. Plant your feet firmly on the ground and slowly lie down on top of the roller so that it runs parallel (or inline) with your spine.
The roller should be both under your glutes and also under your head, you don’t want your head hanging off the end. This is going to require some balance, so if you feel it in your abs as well, that’s perfectly fine. With this foam roller stretch, you won’t be rolling at all, you’ll be using your arms for the movement. Place your arms down at your sides.
Keeping them completely straight, lift them up and over your head until they are touching the floor behind you (like you’re raising your arms in excitement). You can also raise them sideways mimicking a snow angel type of movement.
Pro tip: make sure you relax your body and completely open your chest so that you’re making the most out of this exercise. The key here is to stretch and relax your muscles, you’re not massaging anything with this exercise.
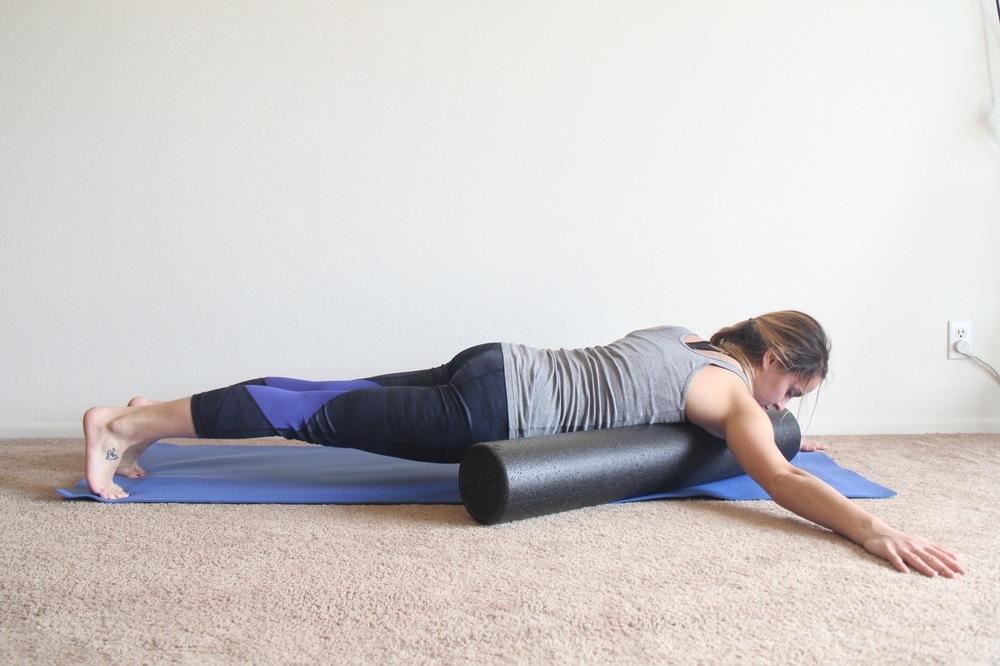
Lats
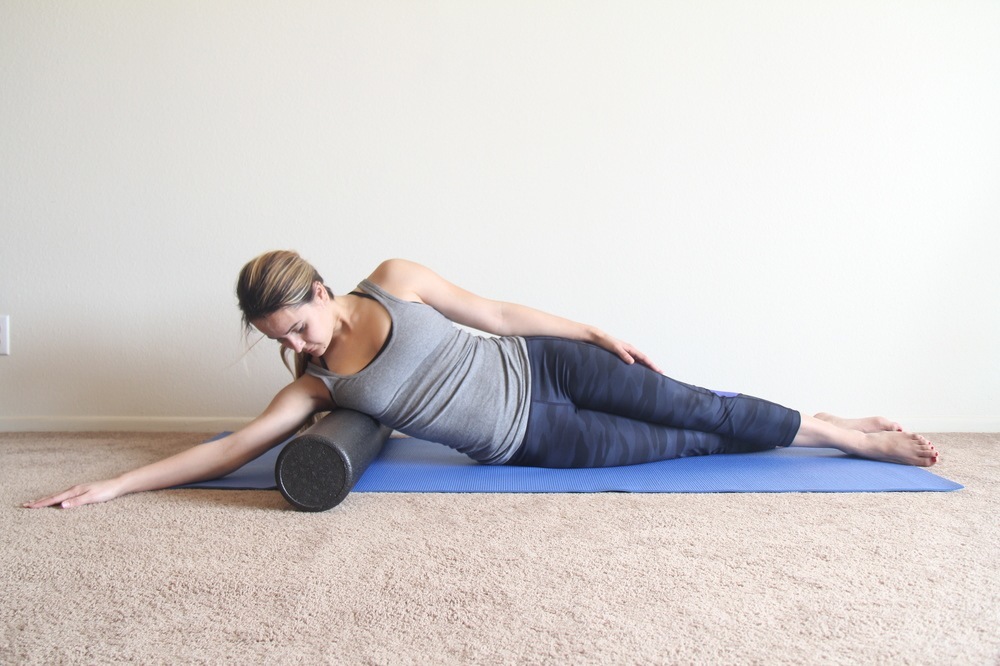
Lie down on your right side with your right arm pointed up and away from your body. Place your foam roller under your side, just below your armpit. Start with your legs bent as you’ll be using these to help push your body up and down the roller to hit the lat muscle properly. You can either place your arms on the ground or have them elevated, but the important thing is to make sure the majority of your weight is placed on the foam roller and not on your legs or arms so that the roller does its job of massaging the muscle. Once you’ve gotten into a comfortable position, use your legs and roll up until the foam roller is at the lower part of your lat, and then roll back down until the roller is back at your armpit. Repeat the same steps on the left side when you’re done.
Neck & Traps
Like the lower back, the neck is another muscle where I’d say you would get far more relief using a smaller tool like a massage ball or a massage pillow (like the Shiatsu Neck & Back Massager Pillow I talked about in the lower back section). The neck is a tricky area because it’s small and requires precise pressure in order to relieve pain. The point of a foam roller is to use your body weight to provide pressure on the muscle you’re trying to massage. The problem is, that is way too much pressure to put on your neck, putting a lot of unnecessary strain on the area. Not only that, but with a big wide foam roller you can’t really get the precision you need. The smaller tools I mentioned are literally made with the neck in mind, so I’d highly recommend those over trying to force an exercise with the foam roller.
Legs, Glutes, & Calves
Fun fact: there are more foam roller exercises for legs than any other body part. Plus, legs tend to be the most popular area on the body to foam roll, so that’s where we’ll start.
Quadriceps
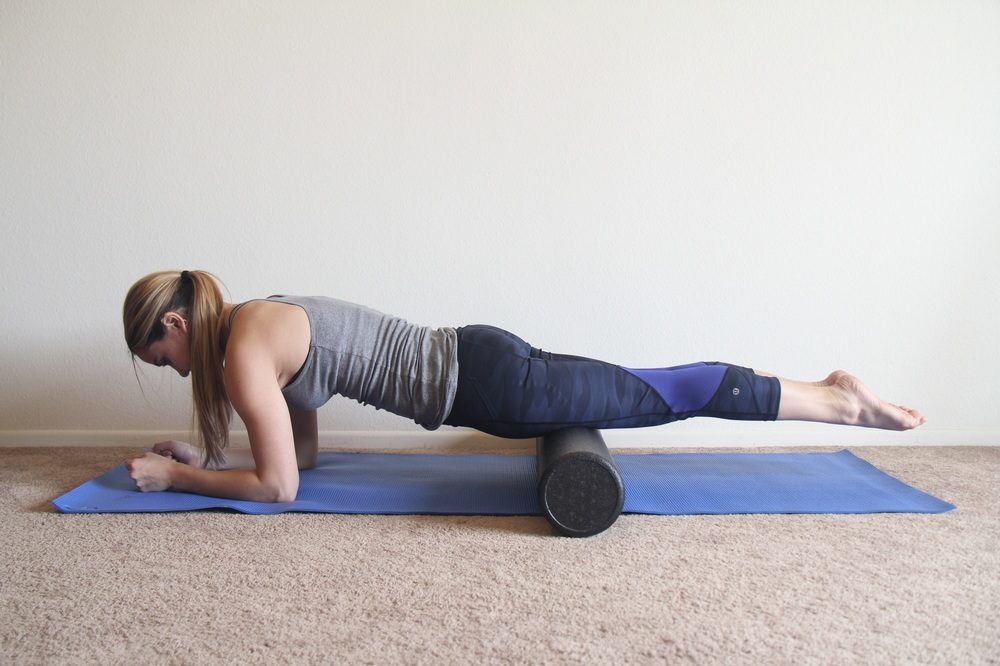
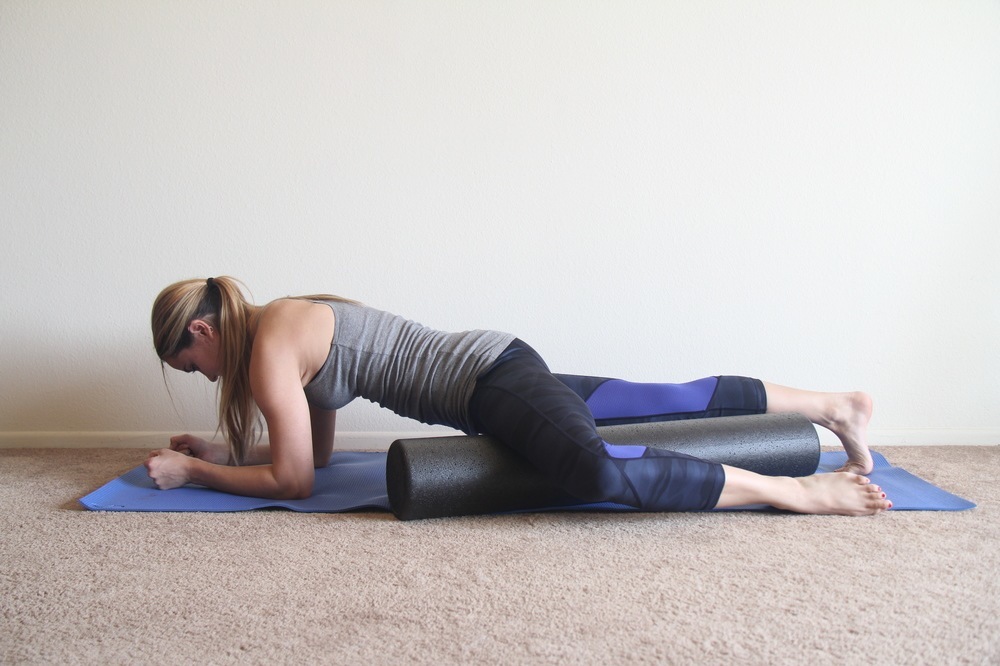
Kneel on the floor and place the foam roller right on front of your knees. Lay down forward so that the foam roller is positioned under your quadriceps and your forearms are against the ground. With this stretch, your body is essentially going to be in a plank position. Your entire body should be in a straight, extended position with feet off the floor so that your legs are resting on the roller and you’re using your forearms to support your weight. Just like with a plank, keep your abs tight and drawn in towards your spine to protect your lower back. Roll back and forth along the top sides of your legs, from the hips to the top of your knees.
Pro tip: If you feel a sticking point or a knot in your legs, stop, put your toes on the ground, and curl your leg up to your butt a couple times to help massage the knot out.
IT Band
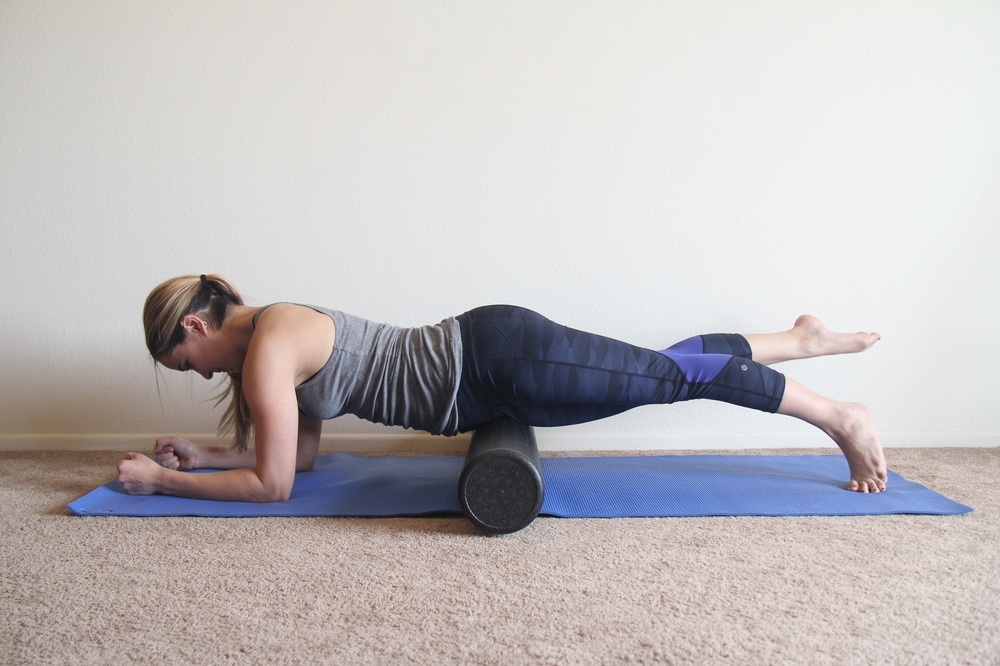
Begin by lying on your right side, body fully extended, with the foam roller placed under the outer side of your right leg (just below the hip bone). Place your right forearm on the ground as a base for your body, and bring your left leg up and place it in front of your right leg so that your left foot is on the ground. Your right leg should still be fully extended, and now lift your right foot off the floor so that your body is balanced on its side on top of the roller. Using both your forearm and your left leg for support, roll up and down your leg from the top of your hip all the way down to the top of your knee. Once you’ve taken care of the right leg, repeat the steps for your left leg IT band.
Pro tip: your IT band plays a huge role in a lot of your body’s movements, running from your core all the way down the outer side of your upper leg (next to your quads). This is by far one of the best foam roller exercises to alleviate leg soreness, but let me warn you now it’s also sometimes one of the most painful, so start slow and ease your way into things. It will get less painful over time and with practice.
Hip Flexors
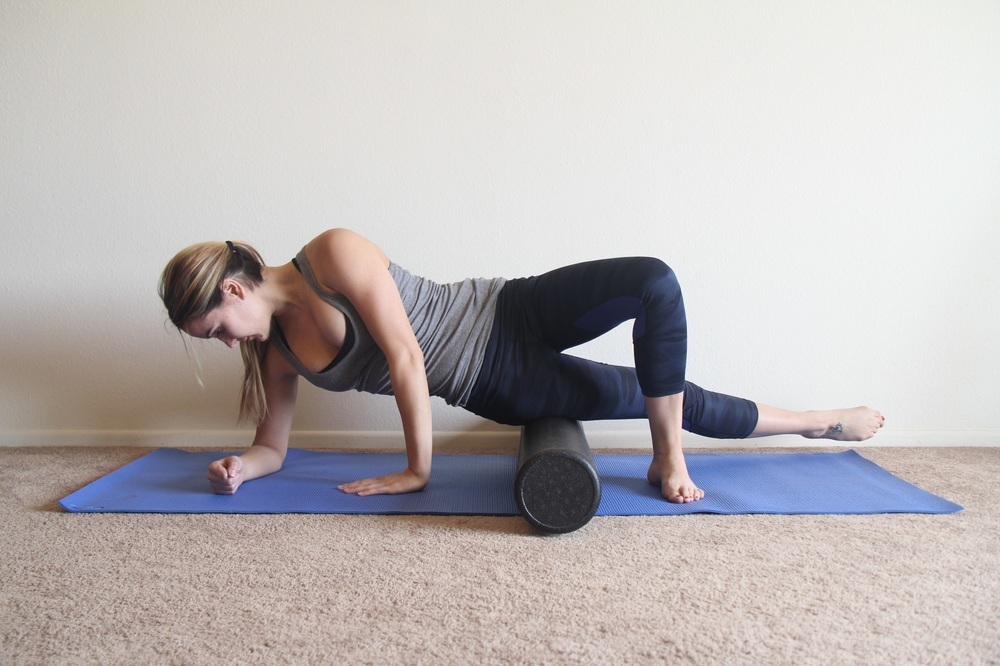
The hip flexors and the IT band are located in the same area, so these two stretches are going to appear very similar, but with one small variation you can target the hip flexors instead. So with that being said, just like the IT band stretch, start by lying down on your right side with your body extended and place the foam roller under your hip.
The difference with this exercise is that you want your body to be slightly angled towards the floor. This small turn of the body makes it so that the pressure of the roller is focused directly on your hip flexors instead of the IT band. Turn your body towards the floor until the foam roller is sitting under the front portion of your right hip (basically where your hip creases when you bend over). Once you’re there, roll up and down the hip area only, no need to run down your entire leg with this one. You will feel the burn, trust me.
Pro tip: most people don’t realize that the hip flexors play a major role in the overall health of the lower back. If you experience any sort of lower back pain or soreness, performing the hip flexor stretch is one of the best foam roller exercises to help relieve that discomfort.
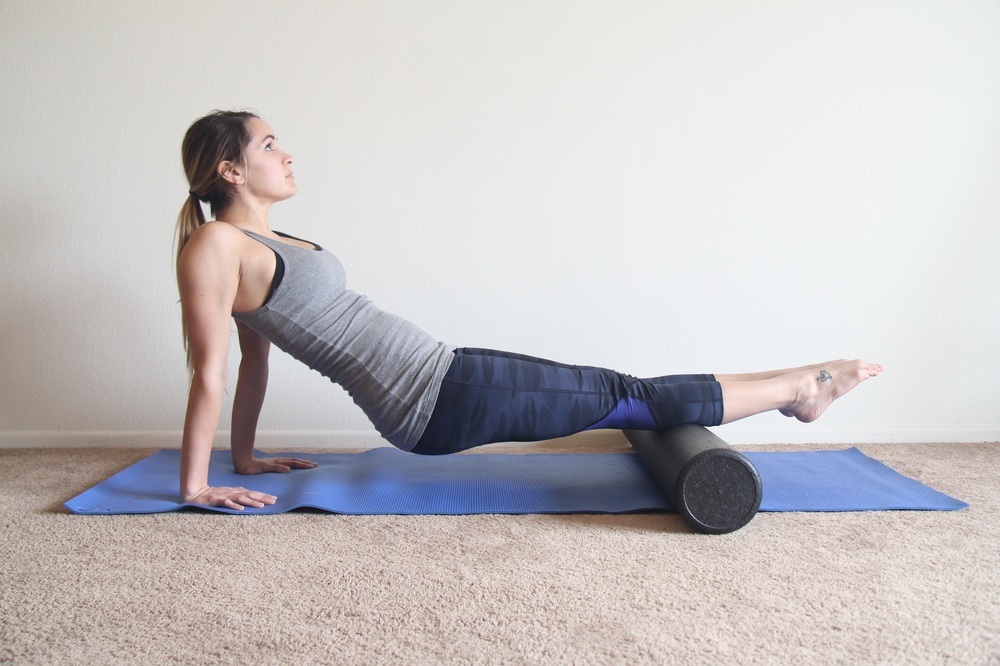
Hamstrings
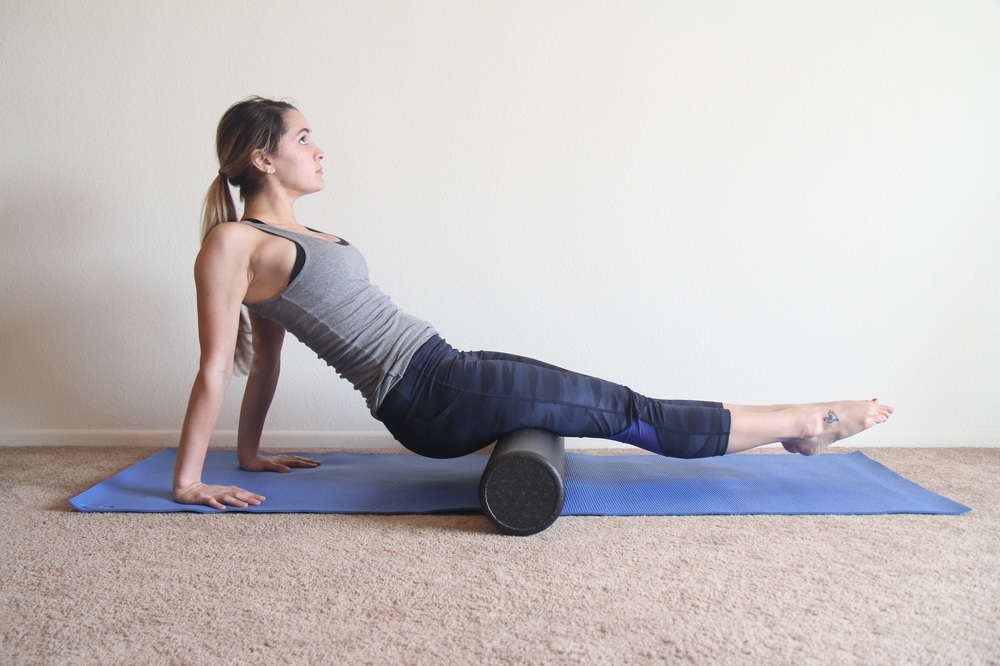
Sit on the floor with both of your legs out in front of you, and place the foam roller underneath the backside of your upper legs. Lean back slightly, use your hands to provide a base for your body, and then push your butt up off the floor and lift your heels off the ground so that your weight is primarily sitting on the roller (your legs should be extended straight out in front of you). Using your arms for leverage and to help hold your balance atop the roller, roll back and forth along your hamstrings from the bottom of your hip bone to your knees.
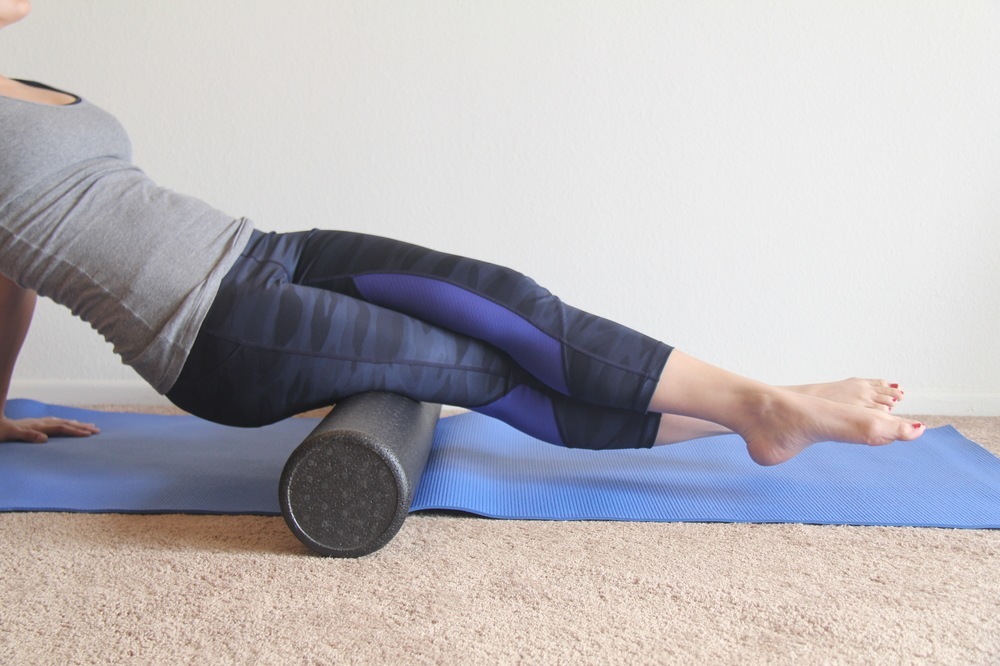
Pro tip: for a more intense massage, cross one leg over the other so that only one leg is resting on the roller. This will add more pressure to the exercise and really help roll out that muscle. This tip also goes for the quads exercise, so keep that in mind.
Adductors (Inner Thigh)
Lie flat on the floor on your stomach with your upper body leaning on your forearms, and put the foam roller on your right side next to your hip, parallel to your body. Slightly twist your body to bring your right leg up and over the roller so that your inner thigh is resting on it, and then turn your upper body back to position. Keeping your hips open and right leg turned out slightly, move your body from side to side so that the roller is moving from your hips and upper leg all the way down to your knee. Repeat the same steps on the other side of your body to work your left leg inner thigh.
Pro tip: just as with your quads, if you feel a sticking point, curl and extend the leg that’s on the roller until the knot is relieved. This exercise is also more painful as the roller gets closer to the knee, so be careful with this sensitive area. This will get less painful with practice.
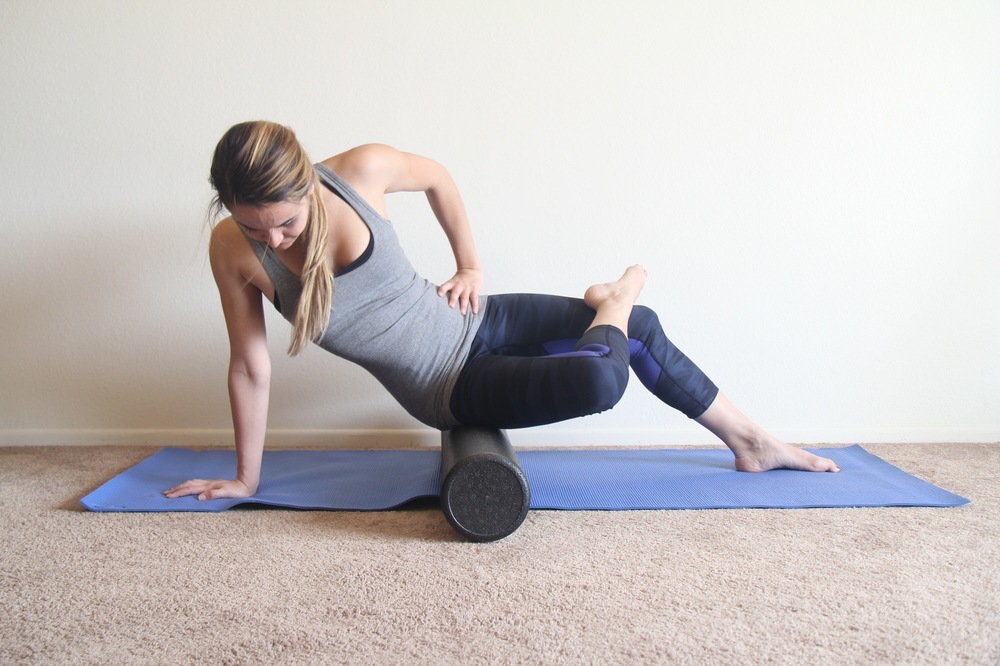
Glutes (and Piriformis)
Start this stretch by actually sitting on top of the foam roller, leaning back on your hands and legs bent in front of you. Cross your left leg over your right leg, and then slightly twist your body to the left, dropping your left knee down and focusing the pressure on the left side of your glutes. Using your arms and your right leg to help you balance, roll forward and back over the entire left side of the butt. When you’re satisfied and your muscle is massaged, do the same steps again but for the right side of your glutes.
Pro tip: when setting up for this stretch, I instructed you to twist your body and drop your knee down. For added variation, change the angle at which your body is twisted to hit different parts of your gluteus maximus. This will help work the muscle from all angles and really give you the glute massage you’re looking for.
Calves (backside)
There are three different foam roller exercises to massage your calves, and I’ll begin with the most traditional. Sit on the floor with your legs out in front of you, and place your foam roller under your calf muscles. Put your hands flat on the ground at your sides, and lift your body off the floor. Your legs should be extended straight out in front of you, not bent. Using your arms for stability and leverage, roll your body up and down across the backside of your calves. You should be starting at the Achilles tendon and moving all the way up just before the backside of your knee.
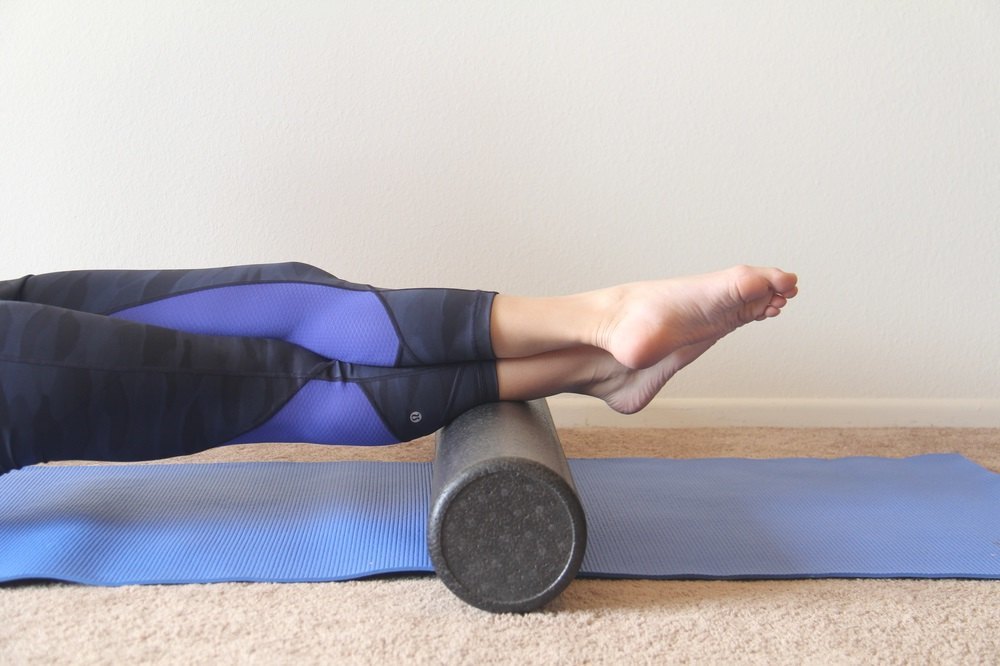
Pro tip: for a more intense massage, cross one foot over the other so that only one calf is resting on the roller. This will add more pressure to the exercise and really help roll out that muscle. This tip also goes for the next two calf muscle stretches below, so keep that in mind.
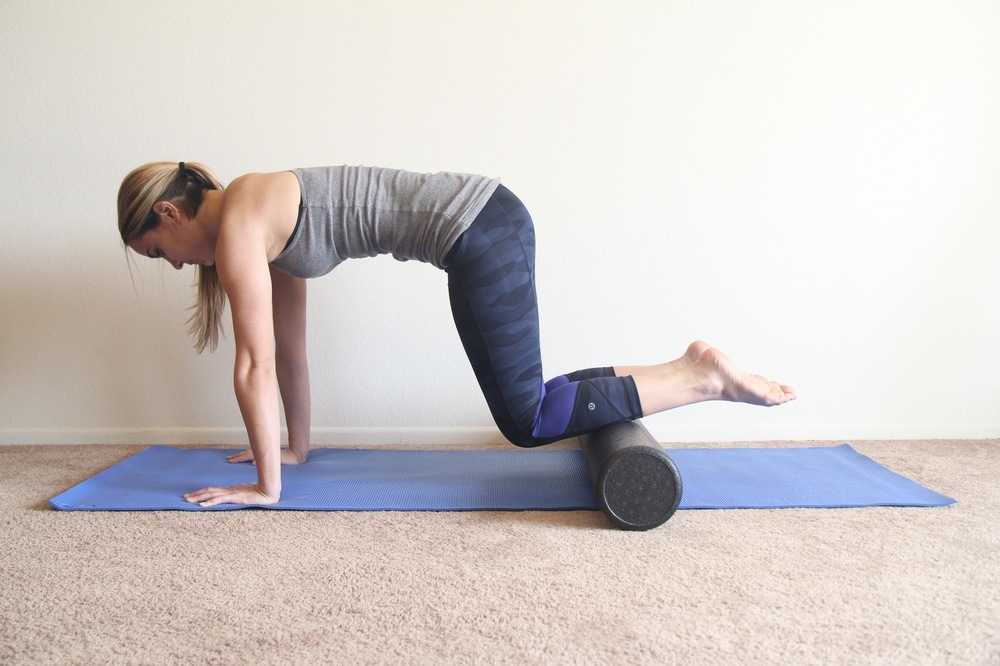
Shins (Anterior Tibialis)
The second calf exercise is the anterior tibialis, aka your shins. Kneel on the floor and slide the foam roller so that it’s sitting under your shins. Bend over forward, place your hands flat on the ground, and push your knees up off the floor so that your body is being balanced on the foam roller. Your hands will act as your support system during this exercise, and your main body weight should be over the foam roller so that the muscles on the front of your shins get the most pressure. Start at the bottom of your shins, and roll up until just under your knee so that you get the entire muscle.
Peroneals (Outer Calves)
The last of the three foam roller exercises for your calves is focused on your peroneals, which is your outer calf muscle. Begin by lying on your right side with your body fully extended, and place your foam roller underneath your outer calf area. Place your right forearm on the floor for support, and then cross your left leg over and out in front of you for added stability. Raise your hips off the floor and position yourself so that the pressure is directed to your outer calf muscle. Roll up and down the calf starting above the ankle and ending just below the knee. Once you’ve massaged this side to your satisfaction, switch sides and repeat the steps for your left calf.
Chest, Shoulders, & Arms
To be honest, not many people use foam rollers for things like the chest and arms. However, there are some great exercises you can do to help loosen up these parts of your upper body.
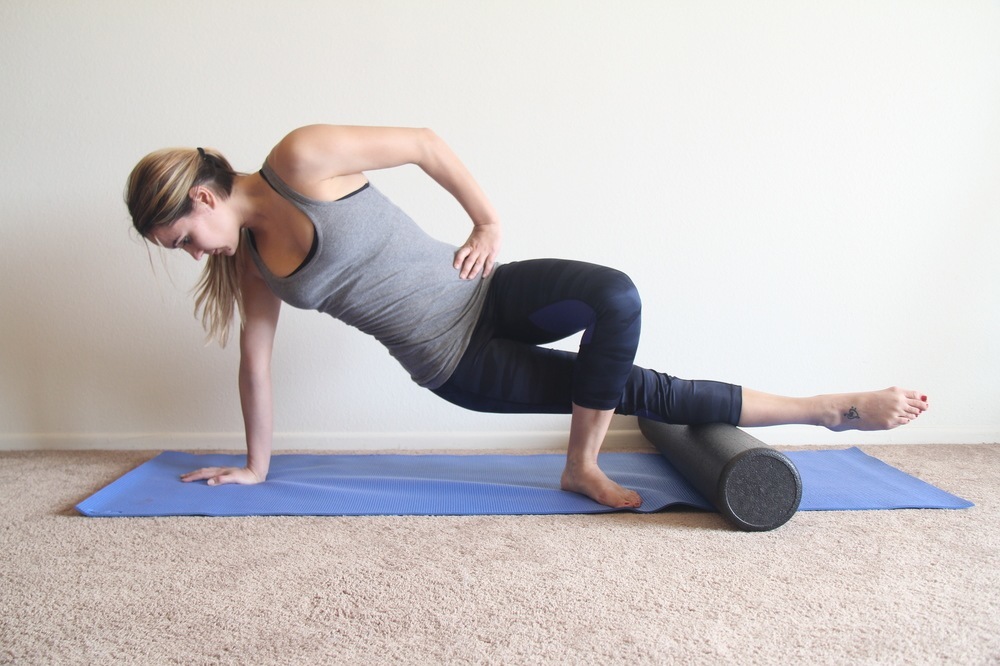
Chest (pectorals)
Lie flat on the floor with your stomach against the ground and your arms out to your sides. Slide your roller under your right arm and pull it against your body so that it is parallel with your right side. Plant your left hand firmly against the ground at a 90 degree angle, and push yourself to the right so that your body goes up and over the roller. The majority of your body weight should be on your chest so that the pectoral muscles receive the most pressure and the best massage. Using your left arm as leverage and support, roll your body back and forth so that your roller is moving over your chest muscles from the outer part of the chest all the way into the center of the chest. Switch sides and repeat steps for left chest muscles.
Pro tip: for added variation, you can also turn the foam roller 90 degrees (so that it’s perpendicular with the body) and roll up and down to massage from a different angle. In addition, ladies, you’re going to have a harder time with this stretch due to your different chest anatomy. You can still perform this exercise, but I’d do it sparingly and when you do I’d recommend shifting your weight so that you don’t have a lot of pressure on your chest.
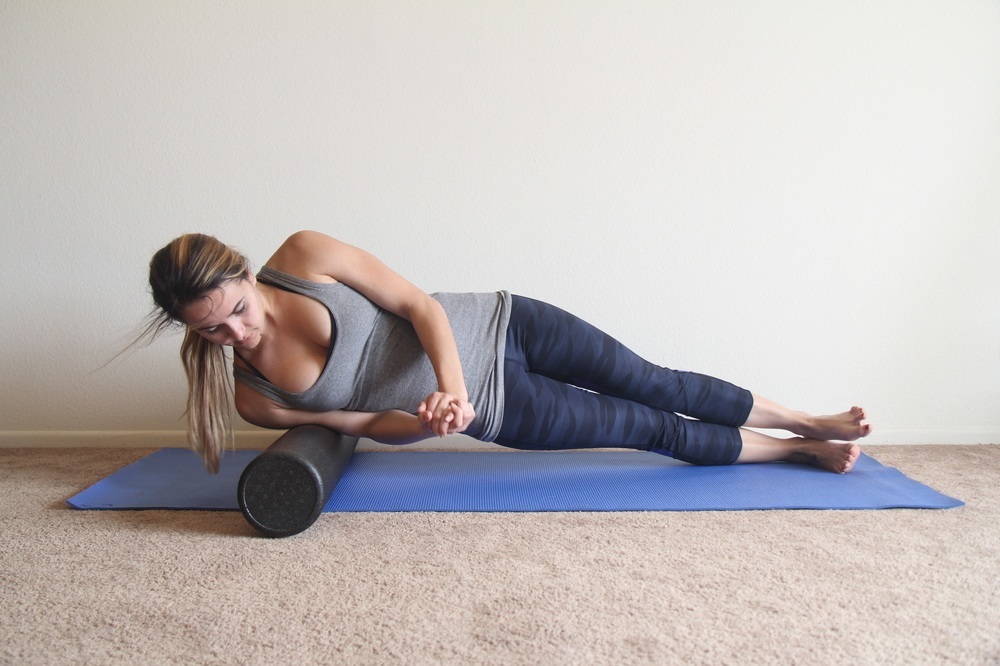
Biceps & Triceps
Lie down on your right side with your legs bent. Holy your right arm out and set your foam roller so that it’s directly under the middle of your upper arm. Place your left hand firmly on the floor in front of your torso and use this as a base to support yourself. Using your legs, roll your body back and forth so that the roller is moving from your armpit area to your elbow. For triceps, you want to rotate your arm so that your palm is facing the ceiling and the roller is purely rolling on your triceps. For biceps, rotate your arm the opposite way so that only your biceps are resting on the roller. Once you’ve done one arm, repeat the steps for the other arm.
Pro tip: doing foam roller exercises on your arms can be pretty painful as the upper arms are very sensitive to pressure like this. Take advantage of your legs and the arm you have as a base to help shift the pressure off of your biceps/triceps if things get too painful.
Brachialis (outside of arm)
The brachialis is the muscle that runs along the outside of your arms, so that’s what this foam roller stretch will be focusing on. This is one of the foam roller exercises where you don’t actually roll much (if at all). Set your roller on the floor and then lie down on your right side, keeping your right arm tucked at your side so that when you lie down, the outside of your arm is against the roller. Using your legs to prop you up, raise your hips off the floor so that your body weight pressure is on the roller. Hold the position for about 30 seconds and then switch sides.
Pro tip: if the side of your arm is knotted or in pain, feel free to roll back and forth slightly to help massage the pain out. Don’t go too far down the arm as this could put too much strain on your elbow joint area, but rolling out a few inches can do some good on those tough knots. You can also roll further up the arm to massage the shoulders, as this stretch is a great way to target the medial deltoid muscles.
Shoulder & Rotator Cuff
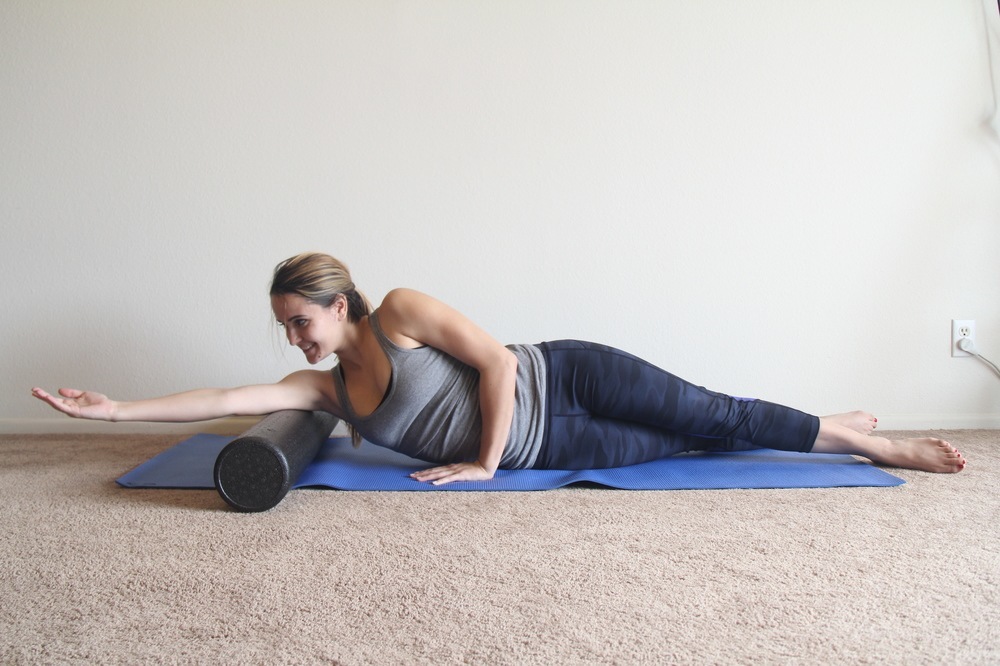
You’re going to start this one similar to the lat exercise above. Lie down on your right side and hold your right arm up and away from your body, preferably above your head. Slide your roller so that it’s resting under your armpit. You should have your right leg extended out straight, and your left leg bent slightly behind you for balance. Once you’re in a comfortable, stable position, you’re going to rotate your body from your side to your back repeatedly. Feel free to roll up and down somewhat as you need it, but the rotation of the body is the main movement with this exercise.
Pro tip: rocking the body from side to back is a great way to open up the muscles that make up the rotator cuff. Make sure to stay relaxed and really open up your arm and chest area so that your body is expanded and you make the most out of this stretch.
Get The Right Foam Roller
There’s no excuse not to have a foam roller at home. They’re fairly cheap, don’t take up much space, and the biggest benefit is that you’ll be able to use it anytime you want. There are a few different types, so I’ll tell you the main differences of each and you can decide which is best for you:
Traditional Round Foam Roller
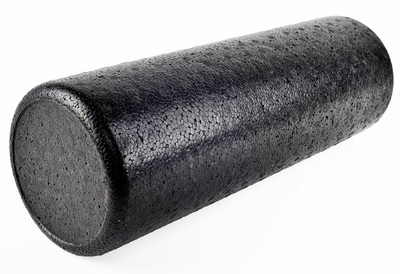
A basic round roller is a great place to get started for those new to foam rolling. You can get one of these pretty much any local sports store, but they’re almost always cheaper online. Shown above is the LuxFit Premium High Density Roller, one of the best-sellers on Amazon. Available in 3 sizes, the LuxFit is high quality and super affordable (under $10 for the 12″ version).
Grid-Style Foam Roller
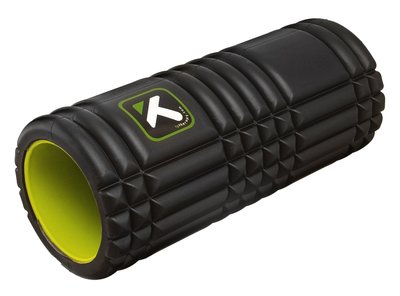
Grid-style rollers are the most popular foam rollers on the market nowadays, recommended by everyone from physical therapists to personal trainers to professional athletes. The unique multi-surface design provides a much deeper massage for better relief of sore muscles. Shown above is the TriggerPoint GRID Roller, the #1 best-selling foam roller on Amazon. It’s extremely well-made, reasonably priced, and has over 2,400 positive customer reviews. The TriggerPoint roller is my personal favorite.
Accupoint-Style Foam Roller
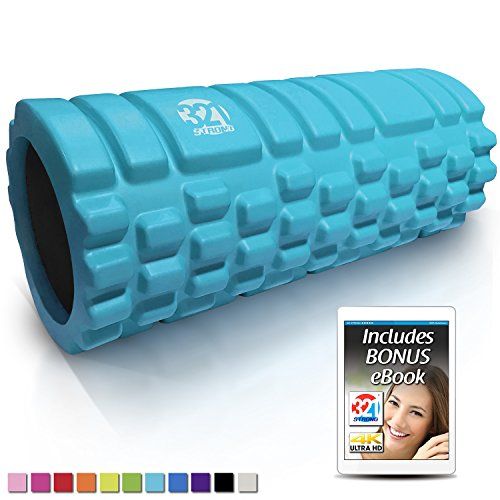
The accupoint-style roller is like a more enhanced version of the grid-style roller. If you’re looking for serious ultra-deep tissue massaging, this is your best bet. The nickname ‘accupoint’ was coined because the checkered pressure point design literally looks like foam rolling combined with acupuncture. Shown above is the 321 Strong Pressure Point Roller Set. This is the best-selling accupoint-style roller, offering a premium product at a low price (plus an included eBook for help with using it).
Foam Roller Tips & Best Practices
In case you’re new to this, there a couple of quick, general tips I wanted to talk about when using a foam roller to massage or exercise your muscles.
• Never roll over your joints (meaning things like your knees, elbows, etc.). First off, foam rolling is a high-pressure exercise, and putting your joints under that much pressure can lead to injury or strain. And second, there’s not even any muscle tissue there, so you literally won’t be doing anything except hurting them.
• Don’t roll over stomach. Foam roller exercises are meant to be done on areas that have muscle tissue on top of bone structures, because those bones will protect the organs beneath them. There are no bones in the abdomen area, so a high-pressure exercise like foam rolling is only going to put unnecessary strain on the organs inside your stomach.
• Discomfort is okay, but don’t make things too painful. Stretching with a foam roller is supposed to massage and relax you, not beat you up. Pain is normal when you’re first getting started, so grit your teeth a little and get through it, but don’t make it to the point where it’s unbearable. If the pain is too much, find a way to shift your body weight so that there’s less pressure on whichever muscle you’re working.
• Last tip. There is no set amount of repetitions or time limit for foam rolling a muscle. The point of foam roller exercises is to relax and massage your muscles, so roll until you’re satisfied. The general guideline is to roll for about 60 seconds on each side, but if you feel that you need more, then keep going!
Special thanks to my beautiful girlfriend for being the model in my pictures! 🙂 If you have any additional questions or feel that I missed anything, leave a comment below and let’s talk!