The purpose of a knee replacement is to replace a diseased or damaged knee to restore pain-free movement of the joint. Before you begin reading this article, it might be helpful to review normal knee anatomy and how a normal knee should work. Also it will be useful to review the article regarding knee arthritis.
The Artificial Knee Joint (prosthesis)
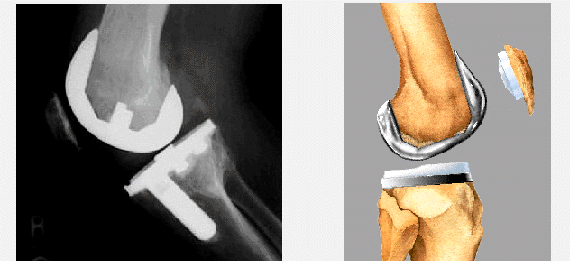
There are many manufacturers of and types of prosthetic knee replacements. During the surgery, the end of the femur, the top of the tibia, and sometimes the undersurface of the patella (or knee cap) are replaced. While currently, cement is most commonly used to fix the prostheses to the ends of bone, non-cemented prostheses do exist and are also used. Ultimately, your surgeon will determine the specific type of knee replacement surgery and implants that are best for you.
Each prosthetic knee typically has four parts:
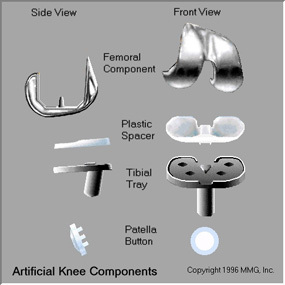
- The femoral component is metal and replaces the end of the femur (thigh bone)
- The tibial component replaces the top of the tibia (shin bone). The tibial component is made up of a metal tray that is usually cemented directly onto the tibia. A plastic (polyethylene) insert is then inserted onto the tray. This results in a stable weight bearing surface.
- A patellar component may be used to replace the undersurface of the patella.
An epoxy type cement is typically used to attach the components to the bone.
An uncemented prosthesis has a fine mesh of holes on the surface of the implants that allows the bone to grow into the mesh. This results in a secure attachment of the prosthesis to the bone.
The Knee Replacement Operation
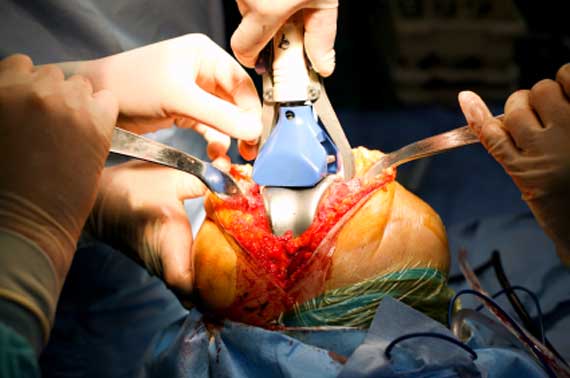
Replacing the knee begins with making an incision on the front of the knee to allow access to the knee joint.
Preparing the Femur
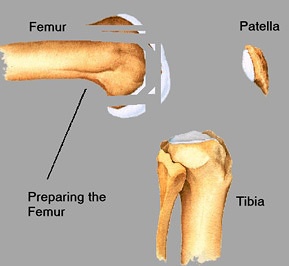 Once the knee joint is entered, a special cutting tool is placed on the end of the femur. This special tool ensures that the bone is cut appropriately to recreate the normal alignment of the knee. Using a saw, several pieces of diseased bone are cut away from the end of the femur so that the artificial knee can be attached.
Preparing the Tibial Bone
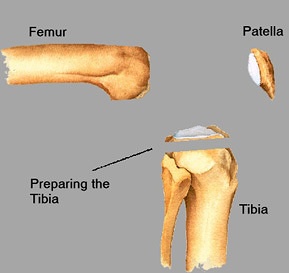 The top of the tibia is then cut using another guide that also ensures proper alignment.
Preparing the Patella
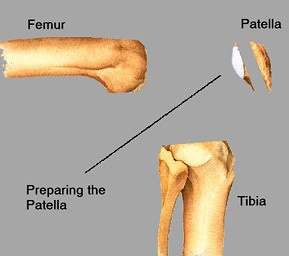 The undersurface of the kneecap may then be removed using a saw.
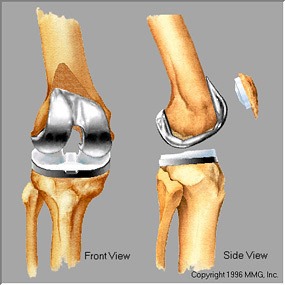
Frontal View of Prepared Knee Bones
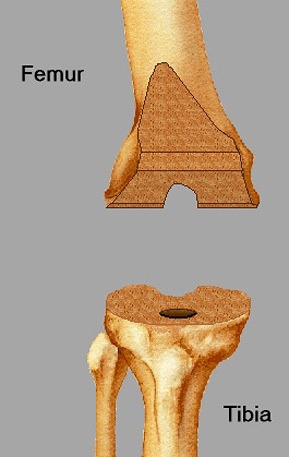
This is what the prepared surfaces look like viewed from the front. The patella has been moved to allow you to see the knee (left)
Placing the Femoral Component
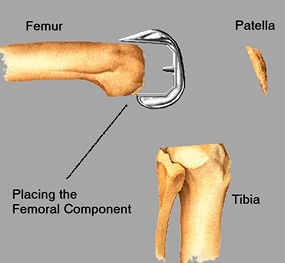 The femoral component is then fitted on the femur. In the uncemented type of femoral component, the prosthesis is initially held on the end of the bone by friction. In the cemented type of component, an epoxy cement is used to attach the metal prosthesis to the bone.
Placing the Tibial Component (metal tray)
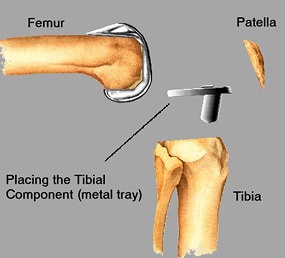 The metal tray that holds the plastic spacer is attached to the top end of the now cut tibia. The metal tray is either cemented into place, or held in place with screws if the component is the uncemented type. The screws hold the tray in place until the bone grows into the porous coating. The screws are left in the bone and are not removed.
Placing the Patellar Component
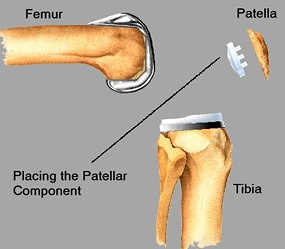 The patellar button is cemented into place on the undersurface of the patella if the patella is to be resurfaced
Placing the Tibial Insert
A plastic (polyethylene) spacer is then inserted into the metal tray of the tibial component.
Trialing
Of note, before the final components are placed, trial (or pretend) components are used first. The size of these trial components are adjusted as necessary to ensure a well balanced and an optimally functioning knee. Small adjustments in the soft tissues may additionally be made by your surgeon to fine-tune the balancing of the knee. Once satisfied with the fit of the components, the final components are secured to the bones as discussed above.
Closure:
The wounds are then closed starting with the deep layers. A drain may or may not be placed. Sutures or staples may be used to close skin.
The illustrations on this page are used with permission by Medical Multimedia Group, 308 Louisiana Avenue, Libby, Montana 59923. MMG holds the copyright on their images.
Total Knee Replacement: a guide to surgery and recovery
Table of Contents
- Knee Replacement
- Visit with Orthopedic Surgeon
- Getting Ready for Surgery
- Making Arrangements for Surgery
- Your Hospital Visit
- Recovery at Home
- Regaining Knee Strength and Motion
- Knee Replacement Surgery
- Complications of Knee Replacement Surgery
